
If you love succulents, chances are that you will want to put together your own “creation” in the form of a succulent bowl. Since I have been around a long time (I am NOT old!), I have learned the “hard way” how to do many things, and I’d like to help you avoid a few pitfalls. Disclaimer: Just because this is the way that I have found best to plant succulent bowls myself does not mean that there are not many other ways of doing this. Please take this information and adjust it to your own needs.
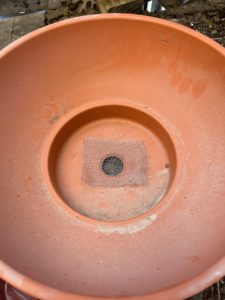
Choose a shallow container that has a drainage hole. I do not recommend planting succulents (or any other plant for that matter) in a pot without a drainage hole. Cover the drainage hole with a piece of window screen or a coffee filter so the soil does not come out. This also prevents certain insects such as Pill Bugs from entering through the drainage hole.

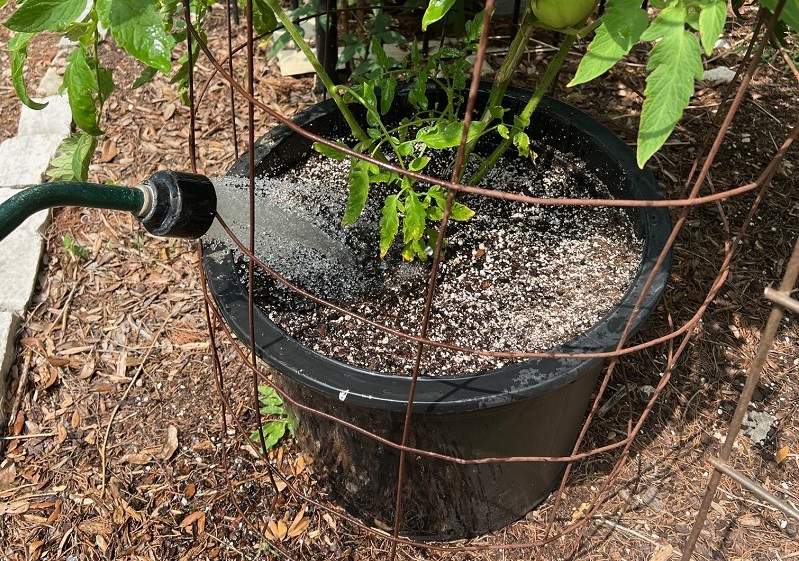
Choose a well-drained potting soil such as Happy Frog Potting Soil. You may also choose a soil specific for succulents, such as Fertilome Succulent soil, or you can mix your own soil using a light potting mix and adding coarse sand (not play sand) or perlite. I do not add vermiculite as it tends to hold too much moisture.
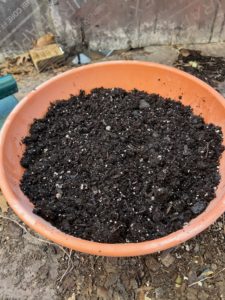
Although I NEVER advise filling the pot to the top with soil, as we usually need a “lip” or “reservoir” to fill with water, I do not follow my own advice when planting succulent bowls. The plants will show up better if planted a bit high, and since we water them so seldom we can afford to take the time to do it slowly and well. Remember the soil will settle once it is watered well, so start with moist soil if you can.
First, fill the pot partway with soil, judging how close to the top of the pot the plants will be when you set them on top of the soil.
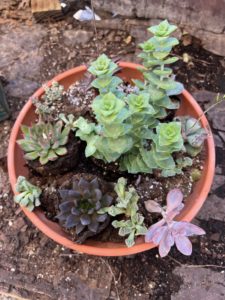
Gather your succulent choices, being sure to vary color, size and texture. They should all have similar watering requirements. Arrange them in the pot with their pots on at first. You can move them around without disturbing the root system better if you leave the pots on. Many times you will remove the plant from the pot and find the root ball falls apart. This is because most succulents do not have aggressive root systems, and they may be quite shallow.
This is when you choose whether you want an “instant” succulent bowl, or one that will grow to fill in the empty spaces. I am building this one to donate as a door prize, so I am filling the pot pretty full with the plants to make it look good now. You can also start with smaller plants and let them grow, but be sure to include some that get taller with ones that stay low. You will have to trim the plants as they grow and remove and replace as they begin to crowd each other out.
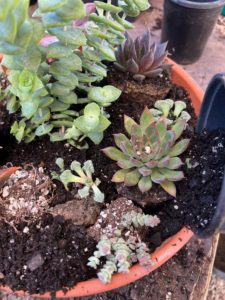
When you have arranged the plants in the pot, you may have to fill in soil under the smaller plants so that the tops of all the root balls are level with each other. When you are ready to add soil, I begin around the edges, placing a layer of soil between the root ball and the pot.
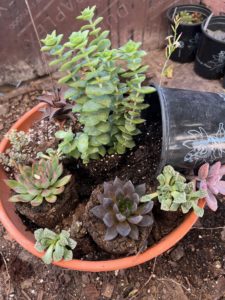
Then carefully fill in between the plants, gently tamping the soil as you go. Do not change the soil level on the plants. Make any additional adjustments with the smaller plants so that they are at the same level as the larger plants.
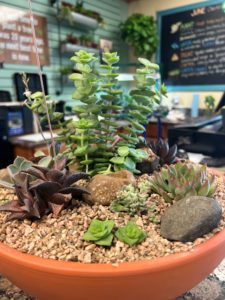
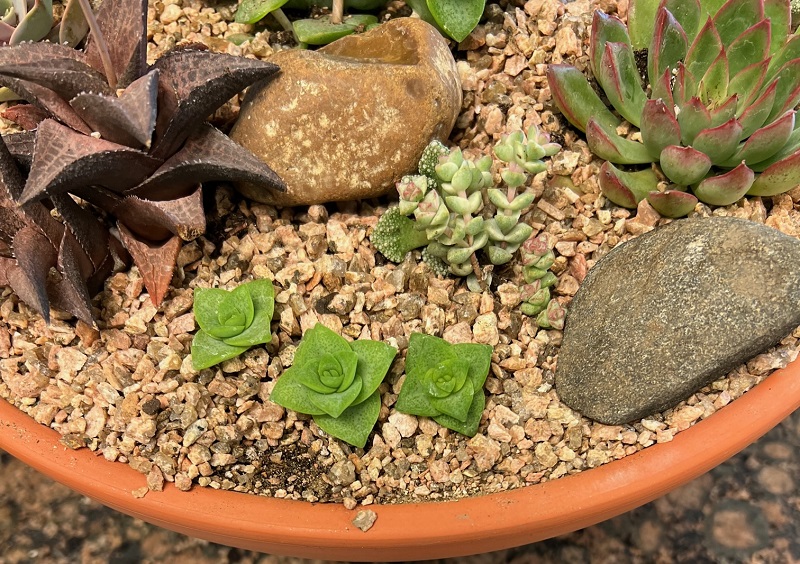
You may quit there if you wish, but I like to top dress the soil with granite gravel and add a few interesting stones to look like there are boulders around the plants. Fossils may be added for interest, as may other ornamentations that you wish to use to personalize your succulent bowl.
Now that you are finished, locate your bowl in bright indirect sunlight. If it is kept indoors, you should only have to water it about once a month. I watch the leaves to see when they just begin to shrivel, then I water. Take the bowl to the sink or outdoors where it can drain. Add water slowly until the entire soil volume is wet and the excess has drained out the drainage hole. If you locate your bowl outdoors, place it in dappled sun. You may need to water more frequently, but you can watch the leaves and feel the weight of the pot to tell when it is really dry. Put it under cover it if rains so the gravel does not wash away.

Leave A Comment