Growing Plumeria
Plumeria are best grown in pots here, as they require protection from temperatures below 33 degrees. Locate your Plumeria in a minimum of 6-8 hours of sun, with some shade from the afternoon sun, if necessary. A well-drained potting soil, such as Fox Farm Happy Frog potting soil, is a must for these plants. Their root systems will seem small for the size of plant, and repotting should be done only when the plants have filled their pots with roots. A 4”-6” jump in pot size is all that is needed at transplanting. I like to keep my Plumeria in plastic nursery pots, and set these down in my decorative pots. This makes for easier transport to a protected location when cold weather hits. As a bonus, if I buy a decorative pot a little larger than the pot the plumeria is in, I can usually reuse the decorative pot after the plumeria has grown and has been “bumped” to a larger plastic pot.
Watering Plumeria
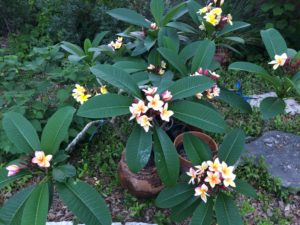
Plumeria should receive regular watering during the growing season. This begins when they first leaf out in the spring, and ends in the fall when they drop their leaves. Plumeria will likely require more frequent watering when blooming, as blooms loose more moisture to the atmosphere than the leaves do. Allow the top few inches of the soil to dry, but do not let the soil dry to the bottom of the pot when the plant is actively growing. Water thoroughly when you water, and do not place a saucer under the pot, or the plant may rot.
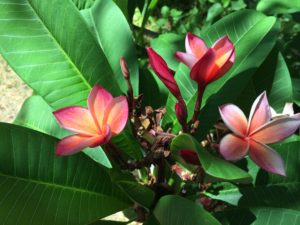
Bloom season in Texas usually begins in May, or when temperatures begin to climb. Older and larger plants may bloom for 6 months or more. Plumeria are heavy feeders, and require regular fertilization during the growing season. The NPK formulation of the fertilizer should have the middle number (phosphorous) the highest of the three.
Fertilizing Plumeria
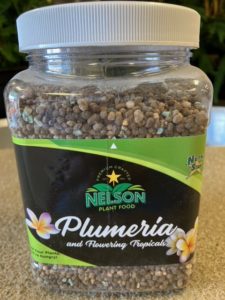
We recommend NutriStar Plumeria fertilizer, which has an analysis of 5-30-5. NutriStar is a time-release granular fertilizer, and should be applied about every 3-4 weeks from the time the plants leaf out in the spring until about September.
Tip: Do not apply fertilizer to dry soil. If the soil is dry, water the plant the night before and apply the fertilizer in the morning. THEN water the fertilizer in. Even time-release fertilizers have some quick-release nitrogen, and this can “burn” the roots if the soil is dry.
How to Overwinter Plumeria
Plumeria are deciduous trees, and will usually lose their leaves naturally in the winter. Leaf drop is controlled by shortened day length and cooler nighttime temperatures. I usually begin decreasing the frequency of watering my Plumeria in September to October, to encourage leaf drop and dormancy before it gets cold.
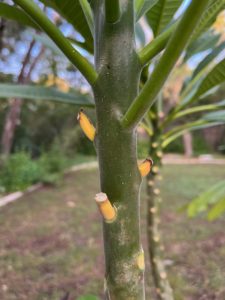
You can also remove the leaves with pruners in the fall, leaving short stubs of the petiole which will turn yellow and abscise naturally. Be sure to wear gloves when you are pruning Plumeria, as the milky sap can irritate skin and does not smell very good either!
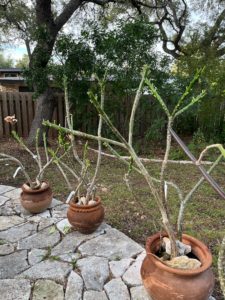
Once they have dropped their leaves (or you have removed them), they may be moved inside a garage or to an area that will not freeze in the winter. They literally need NO water once they drop their leaves and go dormant. Watering a Plumeria without leaves is not advised, as it usually causes the roots and stems to rot.
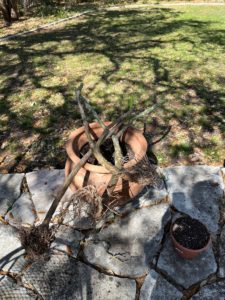
Plants may also be uprooted and soil shaken from the roots to be stored inside the winter, if space is an issue. Simply pot them up again in the spring, water them in, and when new leaves begin to grow you can begin watering regularly again.
Plumeria Pests
Pests to be aware of are spider mites, mealy bugs and white fly. Insecticidal soap or Horticultural oil sprays (if not over 85 degrees F) will usually keep these pests under control. Mealy bugs may require a more aggressive approach. A rust fungus may form on the undersides of the leaves in late summer and fall. Remove the infected leaves and destroy them, then spray with a fungicide labeled for rust fungus to prevent spread.
Rooting Plumeria Cuttings
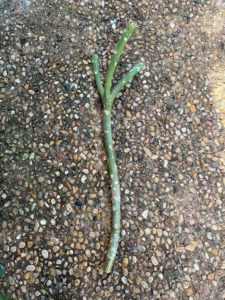
The optimum size for a cutting taken from a Plumeria is 16”-18” long. Let the cut- end dry out in the shade for a few days, then set the cutting 3”-4” deep in a pot with well-drained potting soil that has been watered a day or two before. Adding a few inches of pea gravel on top of the soil will give the cutting stability while rooting, without allowing the cutting to rot.
The most successful time of the year to take cuttings is in the warm months of the year when nighttime temperatures are 65 degrees F or higher. Set the potted cutting in full to part sun, and do not begin to water it until new leaves begin to grow and are at least 6” long. Fertilize only after the cutting has developed a healthy set of leaves and pulling on the cutting tells you that roots have formed. We recommend Nelson Plant Food Plumeria fertilizer granules be applied once a month during the growing season.
Many times a flower stalk will develop on a rooting cutting. The cutting will root faster if the flower stalk is removed.
Typically, a Plumeria cutting taken in the spring takes about 6 weeks to root. The dark red varieties may be more difficult to root, and rooting hormone may hasten root development.
I am often asked when a Plumeria grown from a cutting will begin to flower. This depends on the age and size of the tree the cutting was taken from. Cuttings taken in late winter/early spring from large, older trees (10’+) will most likely bloom the first year. Cuttings taken from smaller trees may take 2 or more years to bloom. If you take a cutting in late summer after bloom season, it may not bloom for a year or two as well.
I hope that you enjoy your Plumeria as much as I do. They really are easy keepers, and give such joy with their blooms.


